You can send correspondence to a Requester at any stage of Request processing. You can also generate a barcode and assign it to a Request. (See the Barcode topic for details).
If you have created a correspondence letter for a Request, you can save it and reuse it for another Request. You can edit body text, add and remove words, change the email address of the Requester, and change the subject of the correspondence.
(!!) Note: If you begin editing a Word document within the Microsoft Word application while the FOIAXpress Correspondence Editor is loading, your Word document will be loaded into the FOIAXpress Application. To prevent your External Word document from being loaded into the FOIAXpress Application, wait until the Editor is fully loaded before editing within the Microsoft Word application.
Steps to Send Correspondence to a Requester
Open the Request for which you want to send correspondence.
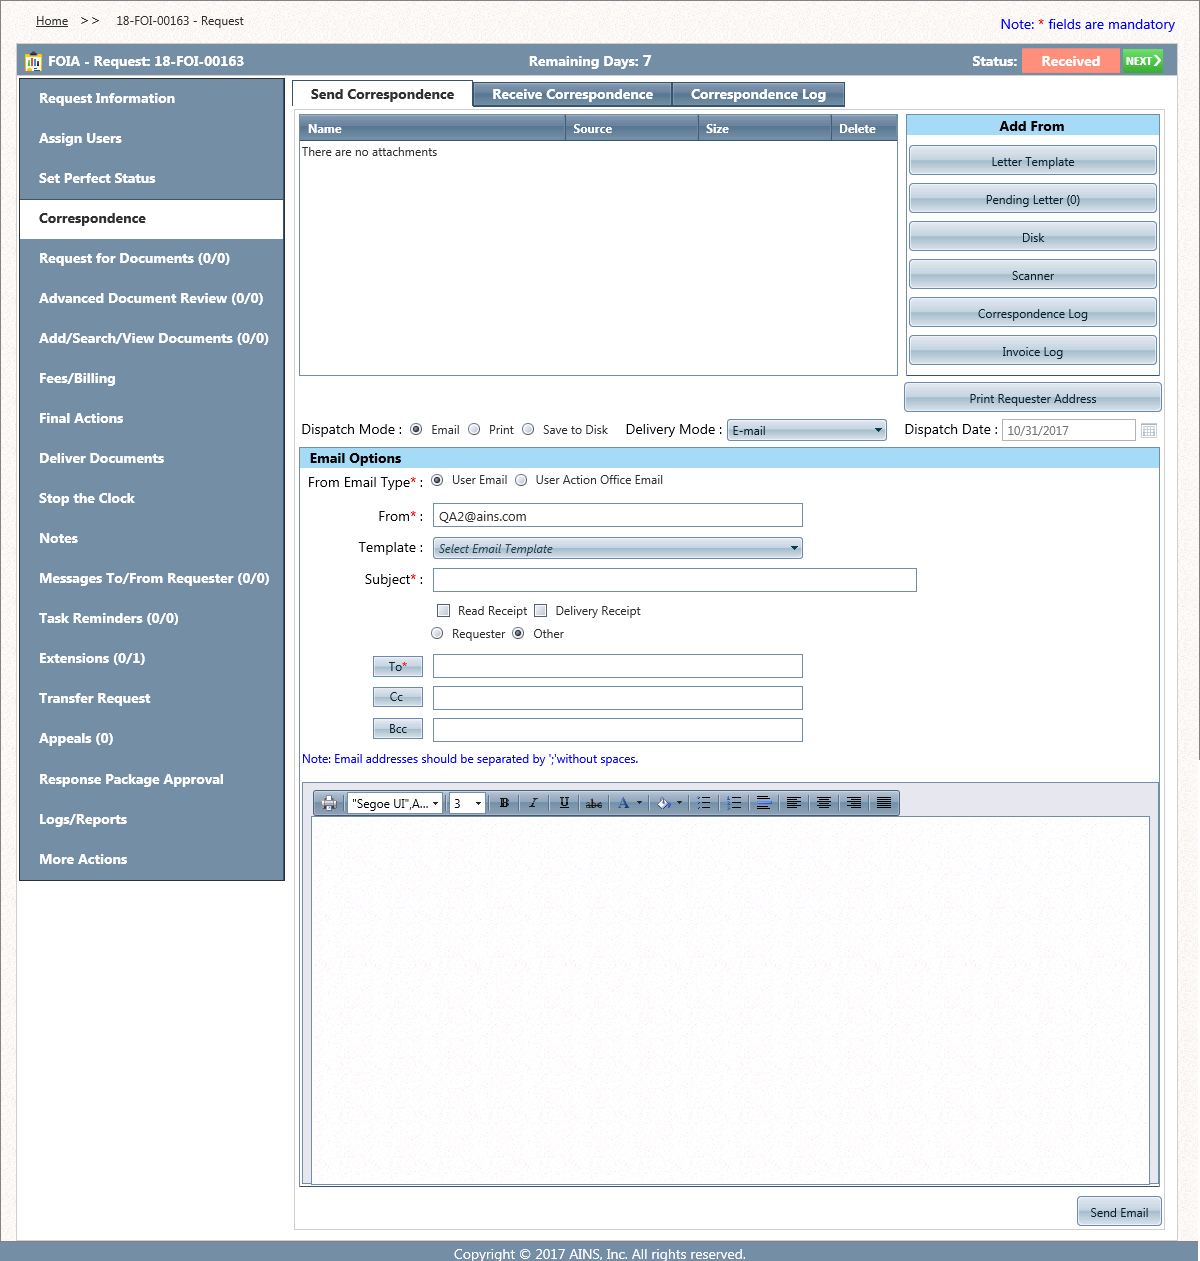
Click Correspondence. The Send Correspondence screen displays as shown below.
Under Add From, click the corresponding buttons for the following options to add attachments or import a correspondence letter
Letter Template
Select an Action Office and Letter Template from the drop-down menus. You can use the letter templates created under Administration>System Configuration >Correspondence Templates.
After a Letter Template is selected, there will be options to Customize the template, Customize for Pending, Customize for Final Response, and to Close the window.
In addition, users have the option to Import From Disk after leading a letter template, which will override the existing template. See the Import from Disk button below:
Pending Letter
After a PendingLetter is selected, there will be options to Customize the template, Customize for Pending, Customize for Final Response, and to Close the window.
(!!) Note: For more information about using a Pending Letter, see the Pending Letter section.
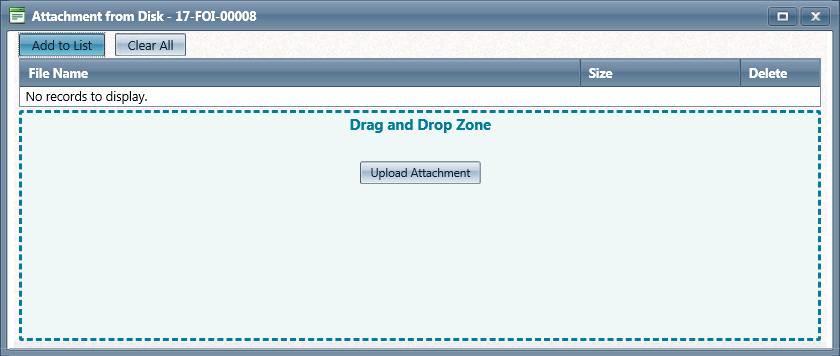
Disk
Scanner
Correspondence Log
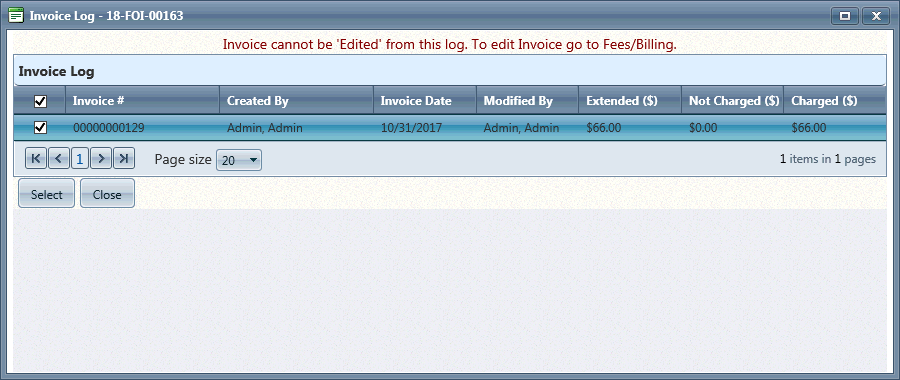
Invoice Log
Select and add any attachment(s). After being added, the attachment(s) displays on the Send Correspondence screen.
Select a Dispatch Mode (Email, Print, or Save to Disk) for the Correspondence.
Select a Delivery Mode (Email, Fax, Mail, PAL, etc.) for the Correspondence.
If you are dispatching the correspondence by Print or Save to Disk, enter a Subject, then click Print or Save to Disk as applicable. If You are dispatching the correspondence via Email, follow the steps in the Send Correspondence by Email section below.
Send Correspondence by Email
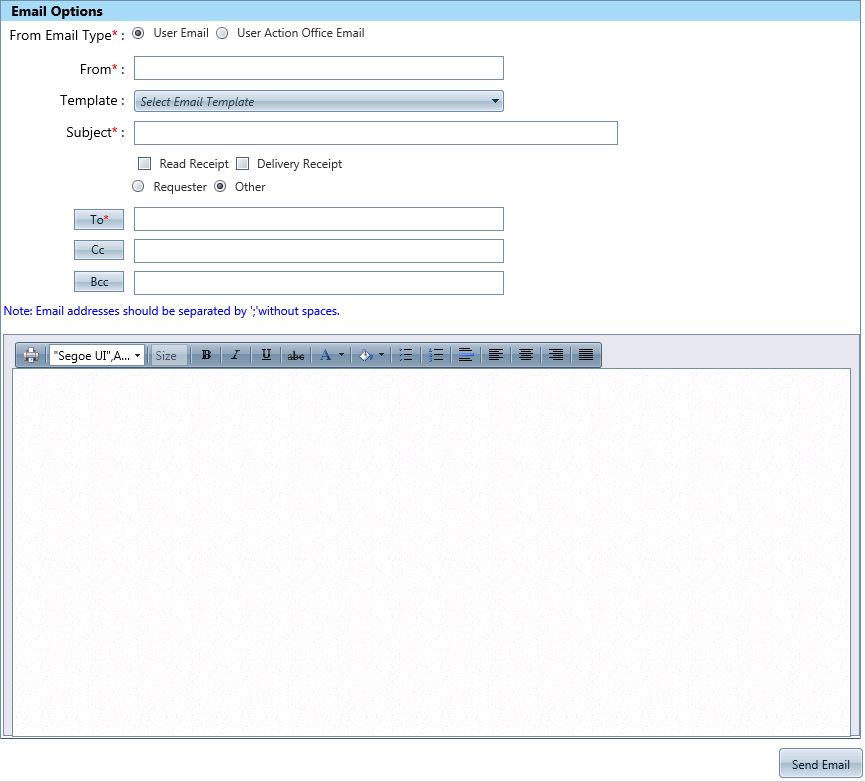
Under Email Options, first select a From Email Type. This is the address that appears in the sender field of the outgoing message. You can select your User Email (tied to your user account) or the User Action Office Email (tied to the email address assigned to your Action Office). After selecting a type, the address will automatically populate in the From field.
(!!) Note: While you can edit the From field, the sender will always be tied to the selected From Email Type
Select a Template from the drop-down list. The template content will automatically populate in the body of the email.
Enter a Subject.
If you would like a Read Receipt or Delivery Receipt, check the Read Receipt or Delivery Receipt checkboxes accordingly.
Select a recipient type by choosing either the Requester (which will populate the Requester's address in the To field) or Other radio button. If you select Other, see steps 6-8 to choose a recipient. Otherwise, go to step 9.
Click To to open the Global Address List screen as displayed below.
Select the individuals you would like to send the correspondence to, then click To, Cc, or Bcc to indicate whether the individuals are the primary recipients, are receiving a carbon copy, or are receiving a blind carbon copy.
Click OK.
If you want to include a message or edit the selected email template, enter the message in the text box provided at the bottom of the page.
Click Send Email. A confirmation message appears. Click OK to complete the action.
(!!) Note: You can open the Correspondence Log to verify that the correspondence you sent has been recorded in FOIAXpress. To access the Correspondence Log, click Logs/Reports > Correspondence Log from the Request screen.
(!!) Note: To print the Requester's address to attach to a hard copy of the correspondence, click Print Requester Address.
Custom Fields
Some templates are created using Custom Fields, which can draw information from other documents or areas to automatically populate relevant details in the correspondence. When loading a template that has been created using custom fields, you will be prompted to select a document from which to draw this information.
These fields can be populated from any document within the Review Log or Request Folder of a request. On loading a template that contains custom fields, the following screen appears:
Select a document from either the Review Log or Request Folder list, choose a Review Layer (if multiple exist), then click Continue to continue with sending correspondence. The fields in the template will automatically populate with the information from the linked document.