You can create one or multiple Invoices for a Request. Each Invoice is generated with a new Invoice number, and you can collect payment for each Invoice. Multiple Invoices can be modified or deleted, however, you cannot delete the most recent Invoice or an Invoice on which a payment has been collected. In addition, you must create a Cost Sheet before an Invoice can be created.
(!!) Note: You can create multiple Invoices with different Invoice amounts, but cannot access the Estimate Cost screen once an Invoice is generated.
Create an Invoice
Open the Request you want to generate an invoice for.
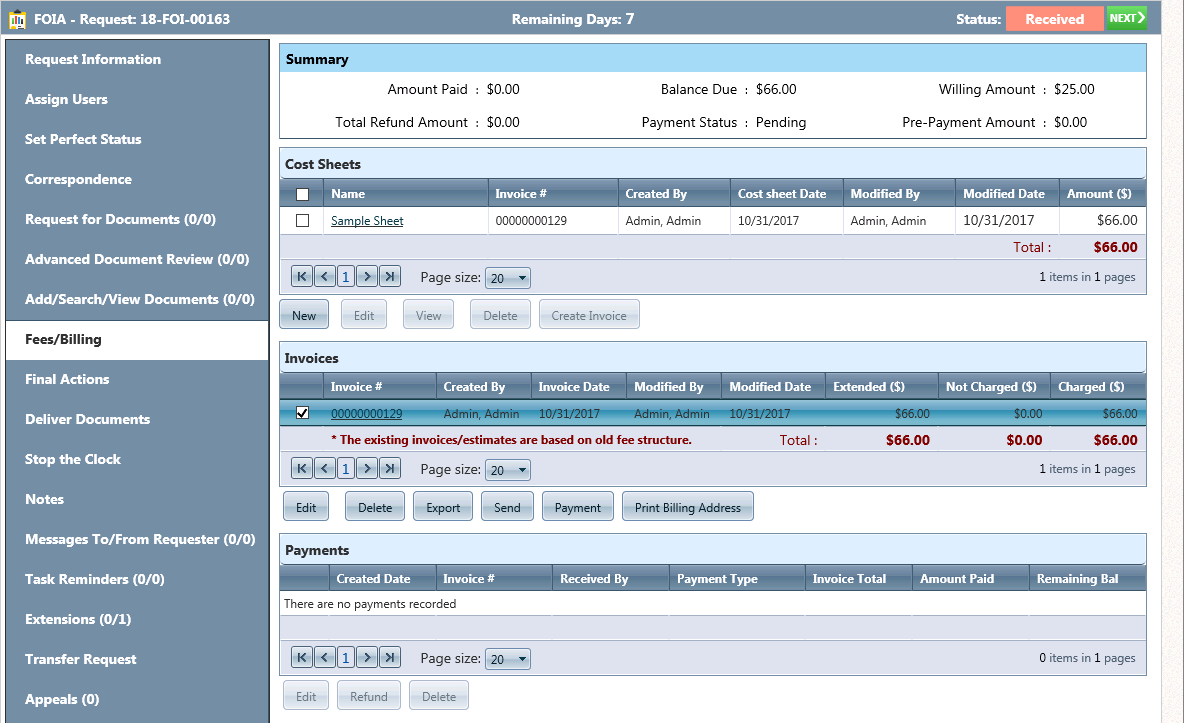
Click Fees/Billing. The Fees/Billing screen displays as shown below.
Select the Cost Sheet you want to use to create an Invoice, then click either Create Invoice or Create Invoice Form 2086 (if you want to create the invoice in DD Form 2086 Format). The New Invoice screen displays as shown below:
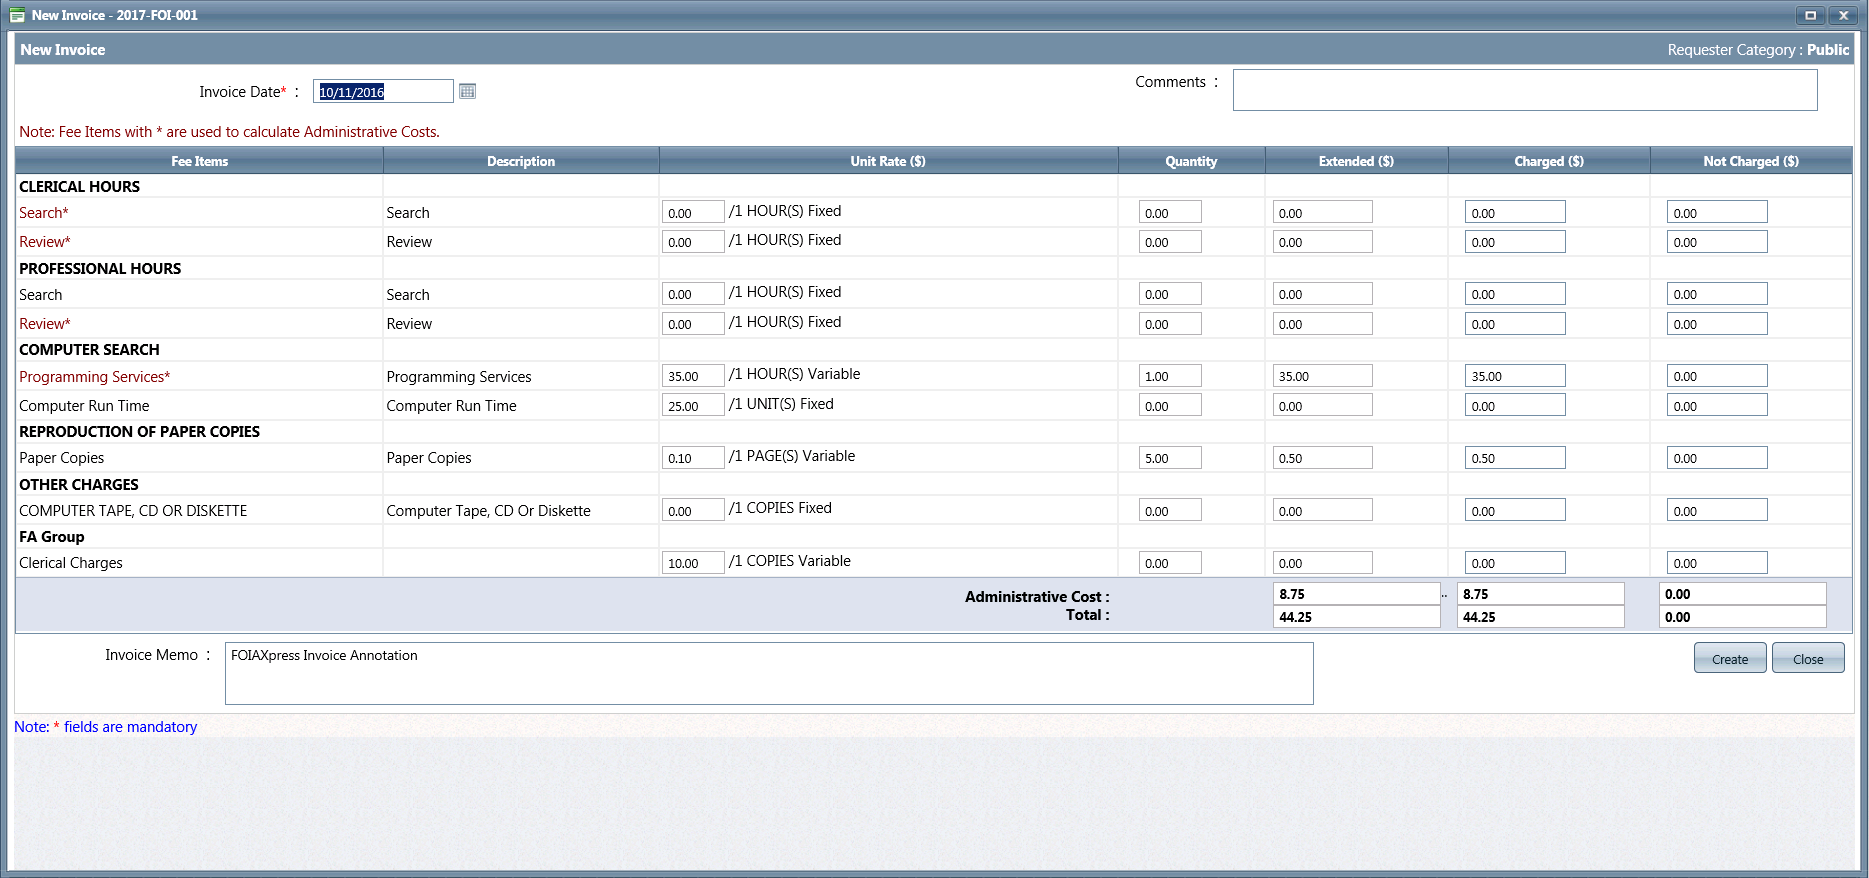
Make any changes to the Invoice as necessary.
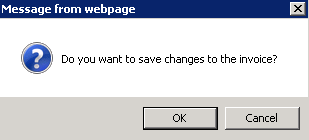
Click Create. A verification message displays as shown below.
Click OK to save the new Invoice.
(!!) Notes:
If the Invoiced Amount exceeds the Willing Amount, you will receive a message asking if you want to place the Request on hold, as shown below.
Click Yes or place the Request on hold, click No to return to the Fees/Billing screen. If you clicked Yes, you will be taken to the Stop the Clock screen.
To place the Request on hold from the Stop the Clock screen, follow the "Steps to Stop the Clock" under Start/Stop the clock.
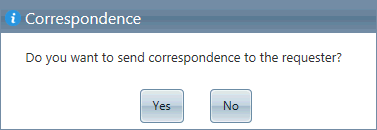
Your system may be configured to prompt to send correspondence. If so, you will receive a message asking if you want to send correspondence to the Requester. Clicking Yes will take you to the Correspondence tab.
If the Invoiced Amount is less than the Agency Billable Minimum configured in Administration > System Configuration >BillingConfiguration, the system will prompt you with a message asking whether you want to accept the charged value or waive it and move all costs to the Not Charged column.
(!!) Notes:
If you click OK, the charged value you have set will be accepted.
If you click Cancel, you will need to move all costs to the Not Charged column for the invoice to generate.
Fee Waiver, Start Date and End Date will be displayed only if you have selected the Fee Waiver Requested checkbox on the Request screen. Once you enter the Start Date and End Date and click Modify Invoice, the dates displays on the Request screen.
Send an Invoice
Follow the steps below to send an invoice to a Requester:
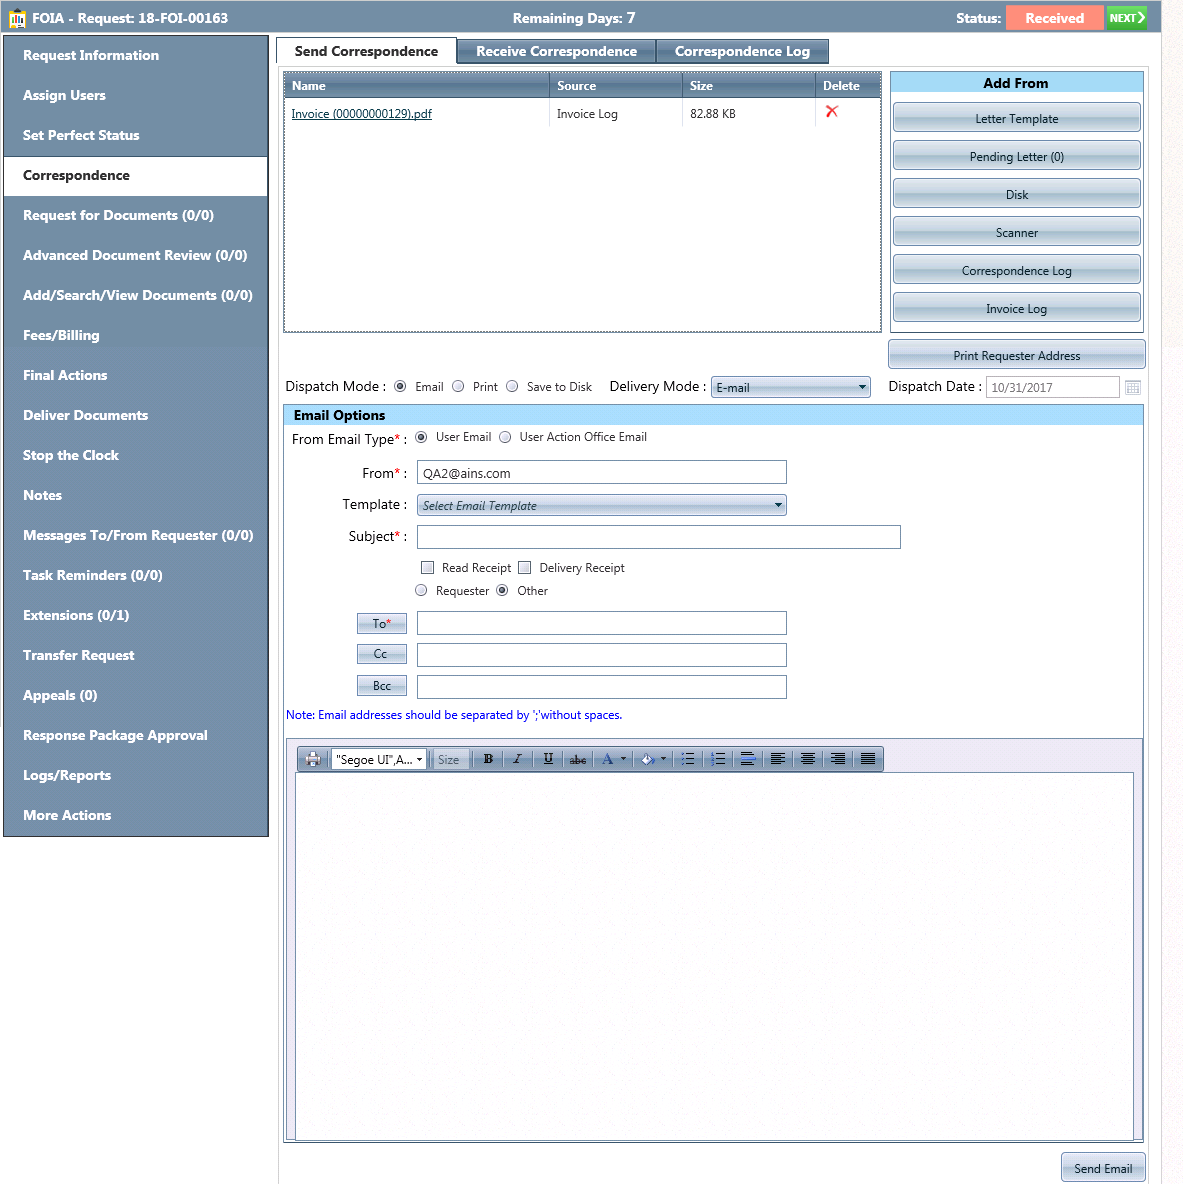
From the Fees/Billing screen, select the invoice you would like to send from the Invoices section and click Send.
The Correspondence screen will open, with the selected invoice listed in the Send Correspondence tab, as shown below:
From the Correspondence screen, you can further configure the sending details, including the message content, sender, and recipient. For more information, please refer to the Send Correspondence section.
Print an Invoice
Use the following procedure to print the Invoice for a Request.
Open a Request for which you want to print an Invoice.
Click Fees/Billing. The Fees/Billing screen displays.
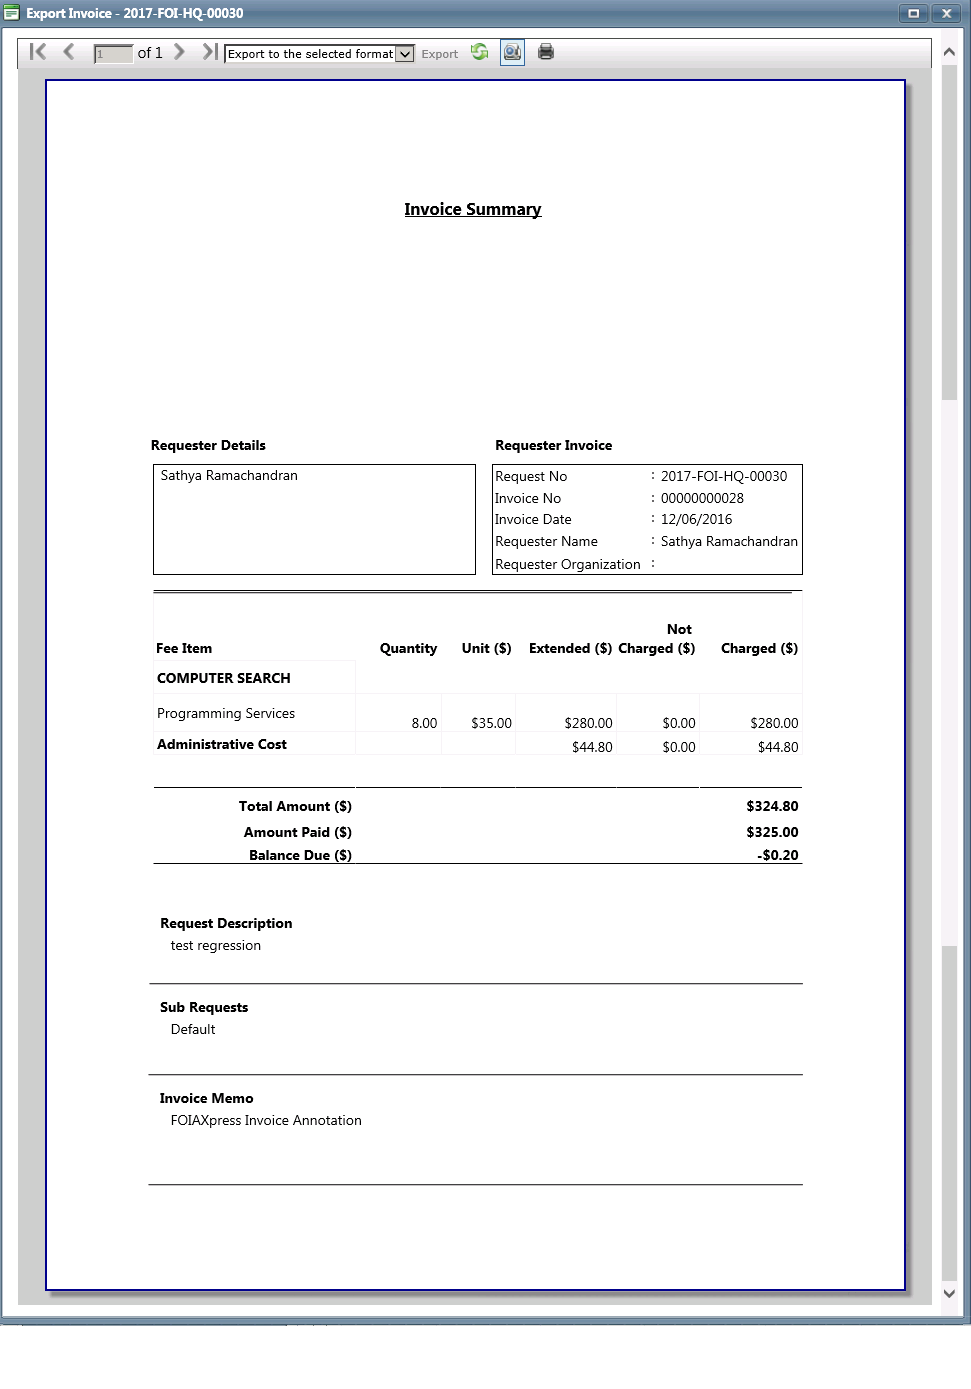
Select an Invoice, then click Export. The Export Invoice screen displays as shown below.
Click the print icon to print the Invoice.
Delete an Invoice
An invoice can be deleted, but only if you have not collected payments for it.
Open a Request for which an invoice has been created.
Click Fees/Billing. The Fees/Billing screen will be displayed.
Under the Invoices section, select the invoice you want to delete.
Click Delete. A verification message will be displayed.


 to print the Invoice.