After a Request has been created, it must be assigned to at least one user.
-
Open the Request you want to assign.
-
Click Assign Users. The Assign Users screen displays as shown below.

-
Change the Request Owner (if needed) by clicking the browse icon  to open the Search User screen.
-
Next to the Change the Primary User for the request to field, click the browse icon  to open the Search User screen.
(!!) Note: If no email is on file for the selected assignee, the Send Email Notification selection will be grayed-out and not selectable.
-
Enter the search criteria as necessary, then click Search.
-
From the search results, select the user you want to assign the Request to, then click Select.
-
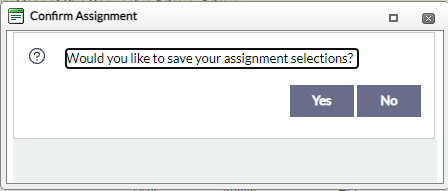
After you are re-directed back to the Assign Users screen, click Assign. A verification message displays as shown below.

-
Click Yes to save your assignment selection. A message confirming the assignment displays.
-
Click OK.
-
To assign secondary users to the Request, click Add Users, Add Groups, or Add Group Queues.
-
Open the Request you want to assign.
-
Click Assign Users. The Assign Users screen displays as shown below.

-
click Add Users, Add Groups, or Add Group Queues to change Secondary Users on the Request.
-
Next to the Change the Primary User for the request to field, click the browse icon  to open the Search User screen.
-
Enter the search criteria as necessary, then click Search.
-
From the search results, select the user you want to assign the Request to, then click Select.
-
After you are re-directed back to the Assign Users screen, click Assign. A verification message displays.
-
Click Yes to save your assignment selection. A message confirming the assignment displays.
-
Click OK.
-
To assign secondary users to the Request, click Add Users, Add Groups, or Add Group Queues.
-
Follow steps 5-8 above to assign Secondary Users to the Request.
(!!) Note: Optionally, you can add an Assignment Note to be included in the assignment email notification (if the Send Email Notification checkbox is selected).
(!!) Note: Users can also check the Attach Request Report (PDF) to the Email notification sent to the assignees checkbox to attach a Request Report (in PDF format), if sending a notification email to the assignees.
(!!) Note: The Primary User is notified when a Secondary User adds documents to the review log of the request.


