Approve or Deny a Timesheet
Follow the steps below to view and approve or deny a user’s timesheet.
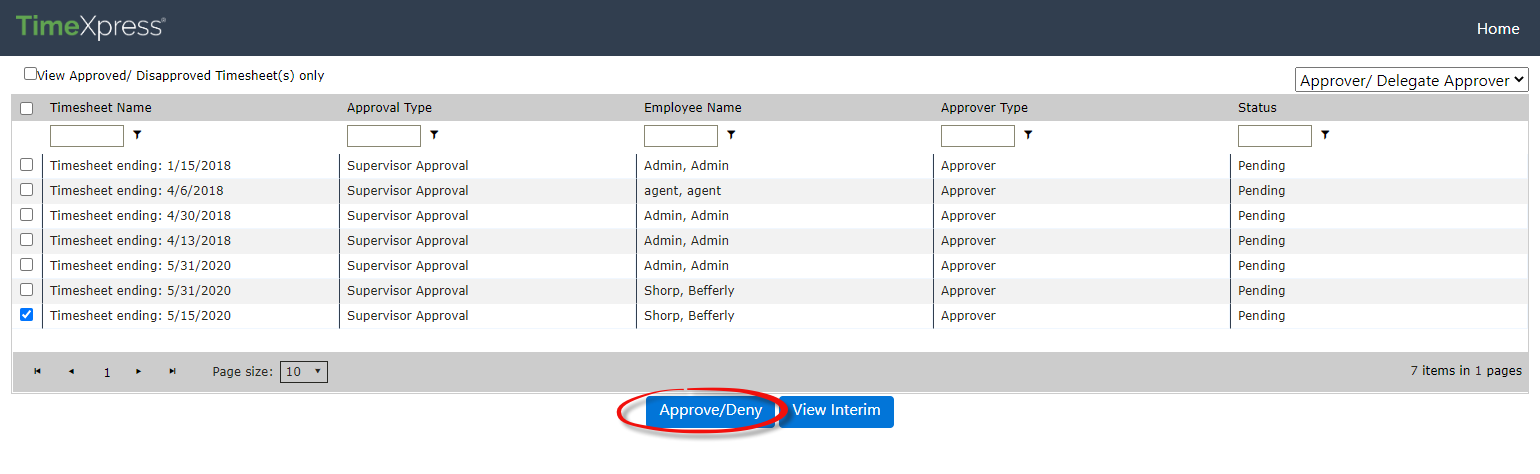
Open TimeXpress and click Approve/Deny Timesheets from the Main Menu.
Select the timesheet you would like to approve/deny, then click Approve/Deny:
The Time Entry form appears as shown below. Review all the (A) Pay Period Time Entries:
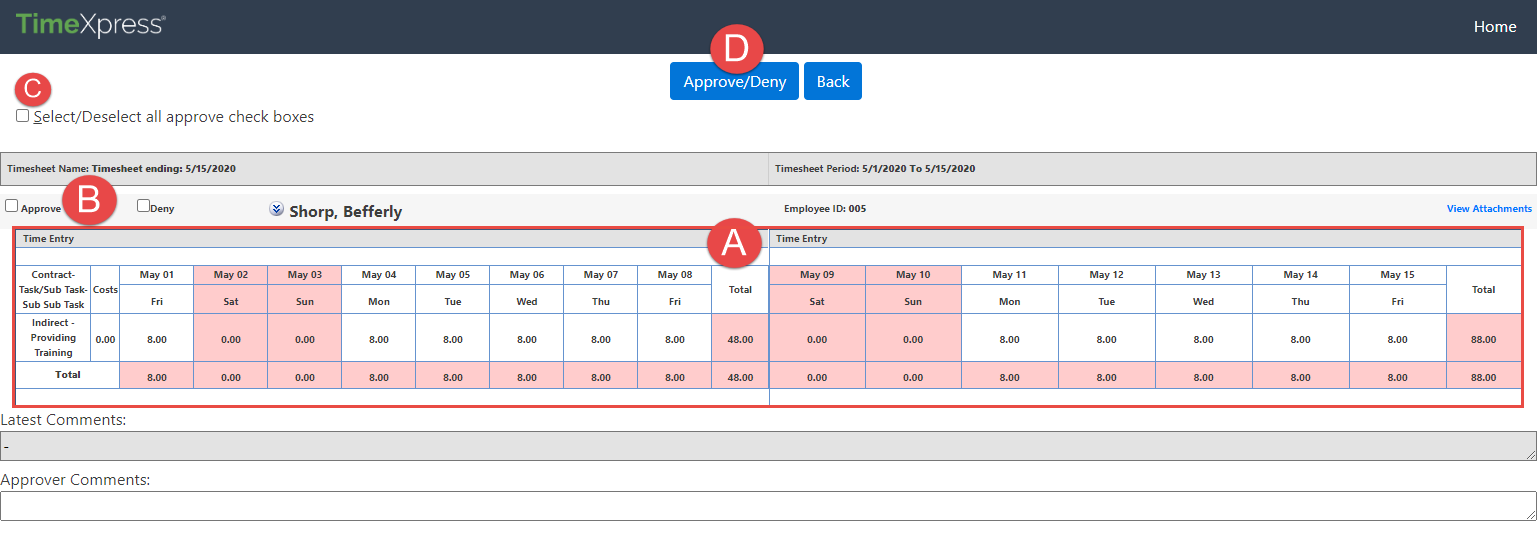
If the timesheet looks good, select (B) Approve. If changes are needed, select (B) Deny, and add instructions for correcting the timesheet in the Approver Comments field.
You can also use the (C) Select/Deselect all approve check boxes checkbox to automatically select Approve on all entries (if multiple entries are present).
When you are ready to approve/deny the timesheet, click Approve/Deny. In this example, we’ll Deny the timesheet:
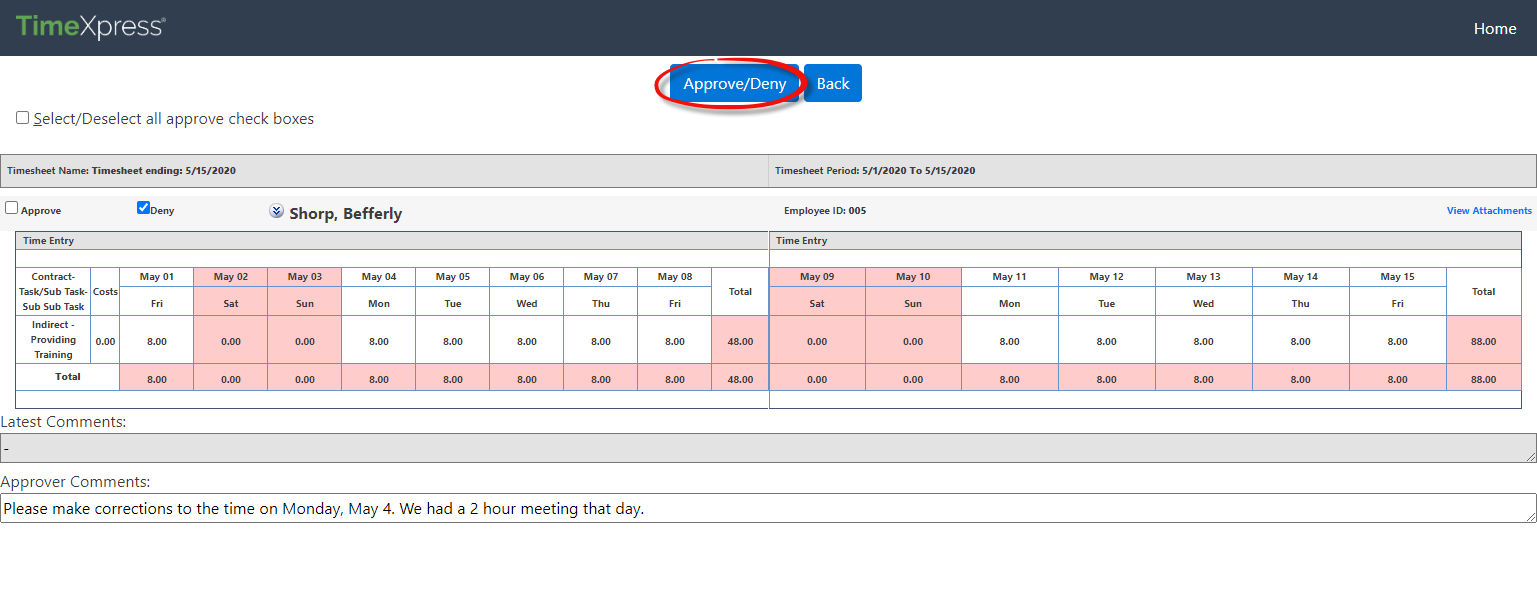
If the timesheet is denied, the employee is notified of the denial and sees the Approver Comments when they log in to correct the timesheet. They will then resubmit the timesheet, at which point repeat the process from step 1. Regardless, the screen below appears after clicking Approve/Deny. Click Back to return to the Timesheet Approval screen.