Accessing Reports & Report Interface
Administrators access Reports from the Administration screen. Follow the steps below to access TX reports:
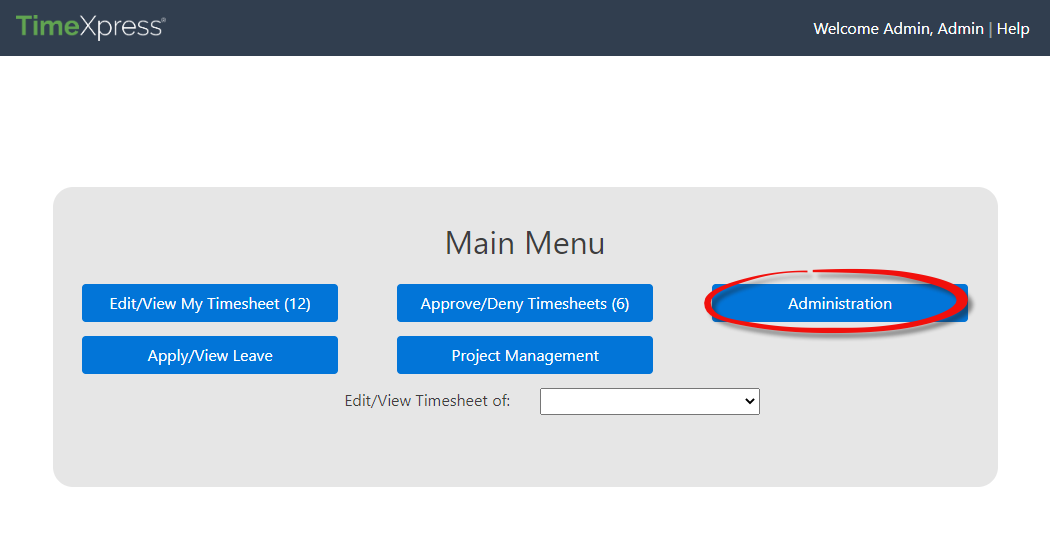
From the TimeXpress Main Menu, click Administration:
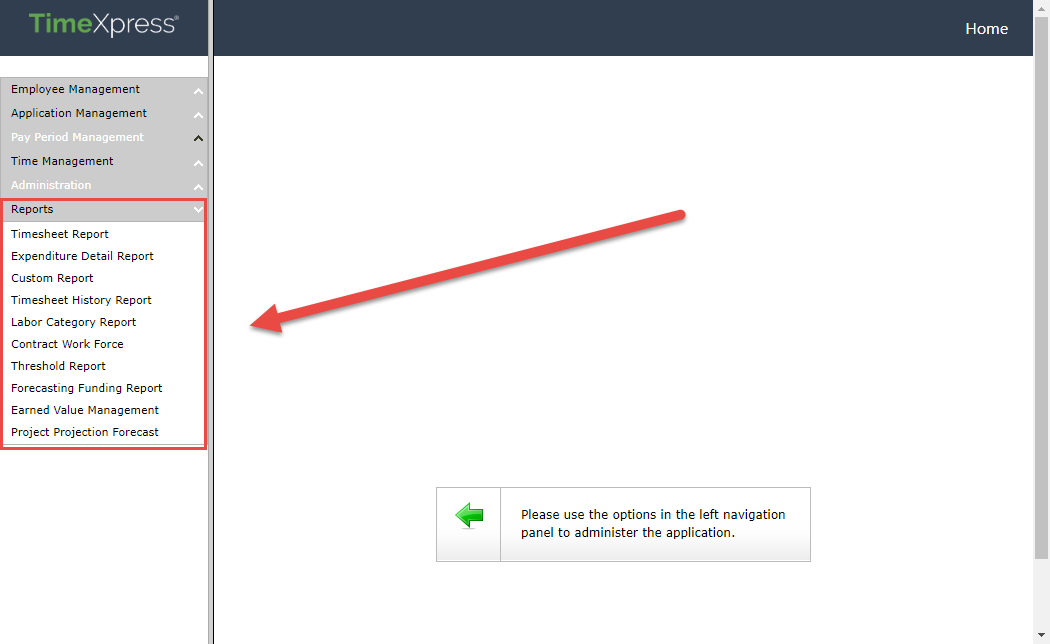
The Administration screen appears. All available Reports are located at the bottom of the left navigation panel, as shown in the following screen:
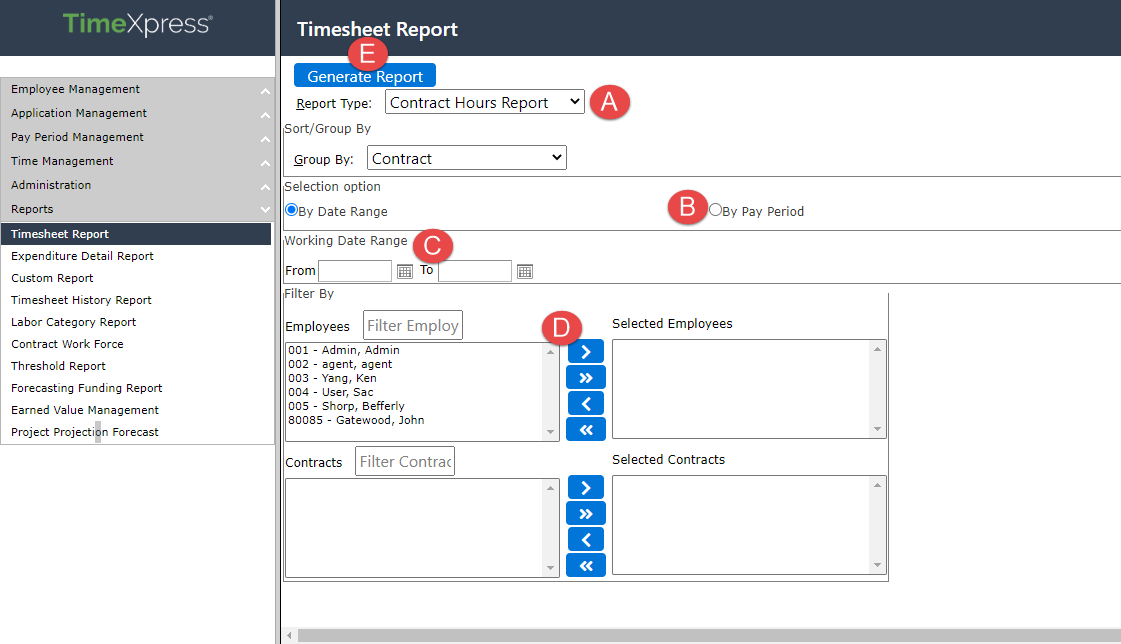
To run a report, select it from the list. In this example we’ll select the Timesheet Report. The Timesheet Report screen is shown below. Depending on the report you are running, there are different selections to make before the report is Generated. These are outlined in the table that follows:
|
Ref |
Element |
Description |
|
A |
Dropdown |
Select an option from the dropdown. In this example there are selections for Report Type and Group By. |
|
B |
Radio button |
Select one of the options. In this example, a timesheet report can be run By Date Range or By Pay Period. |
|
C |
Calendar |
Use the Calendar buttons to select a date, in this case selecting a Working Date Range to include in the report. |
|
D |
Selection fields |
Selection fields allow you manage which data sets are included in the report. The left-side box includes all available options. Use the Arrows to move these to the right-side Selected box. The single arrow |
|
E |
Generate report |
Click this button to generate the report with the selected options. |
 moves the selected item, and the double arrow
  moves all options.
Use the fields on the Report screen to configure your report output. When you’ve configured the report, click Generate Report to view the report output. An example report is shown below, with the elements described in the following table:
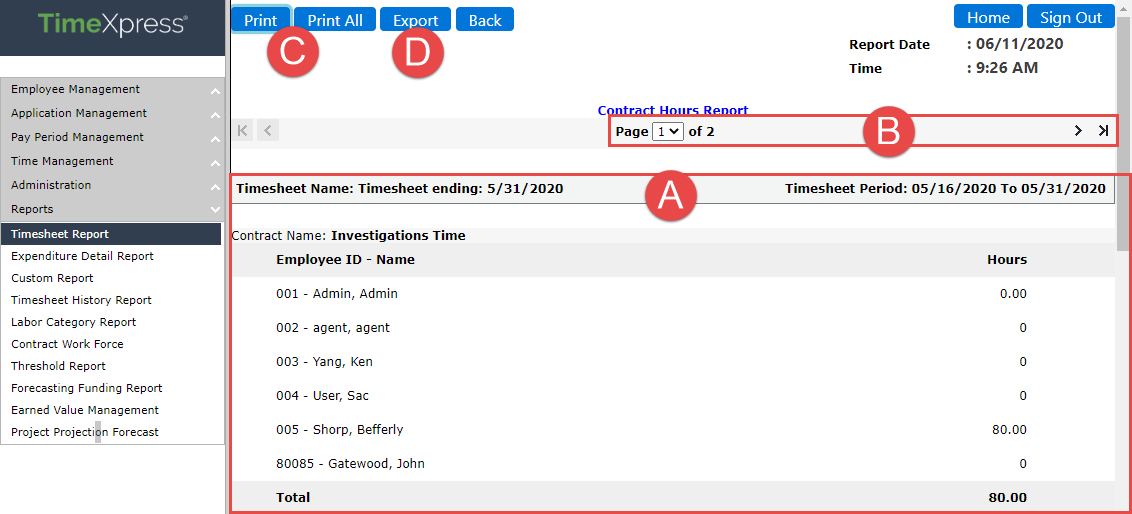
|
Ref |
Element |
Description |
|
A |
Report |
The report data displays in the workspace. Scroll to view the report contents |
|
B |
Navigation |
Use the Arrows or the Page Selection dropdown to view additional report pages. |
|
C |
Print/Print All |
Click the Print/Print All buttons to send the reports to a connected printer for hard copy output |
|
D |
Export |
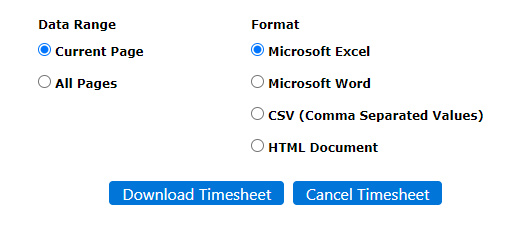
Click Export to export the report data as an Excel, Word, CSV or HTML file. Select the Date Range and Format, then click Download Timesheet to download the file in the selected format:
|