The Email tab allows users to create, read, and reply to email messages that have been sent or received between an Office365 account email address and a contact’s email address (defined in contact form).
When the Email tab has been activated from UI Configuration for a contact type, users can access the Email tab when a contact for this contact type has been selected.
Contents
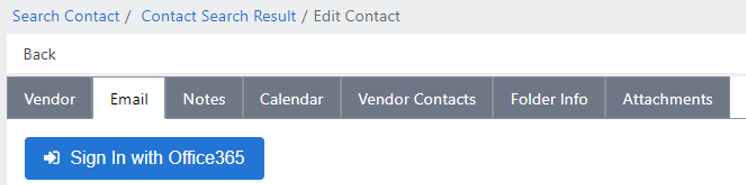
Users must sign in using an Office365 account to successfully access the email features in this tab.
Click Sign In with Office365. A login pop up window appears.
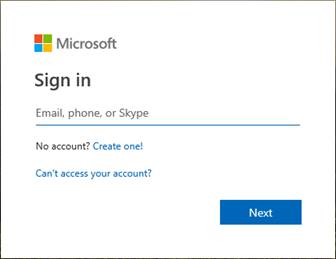
Enter the Microsoft account email address in the Sign In field.
Click Next.
Enter the password for the Microsoft account in the Enter password field.
Click Sign in. After the user is successfully authenticated, if they are logging in for the first time, the system displays a message that requests permissions to allow eCASE to access the user’s data.
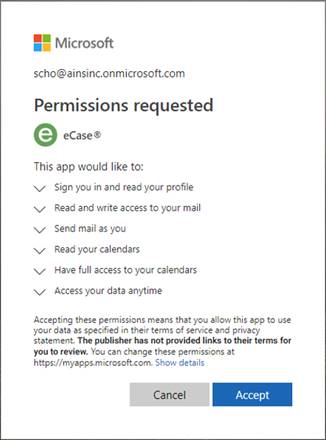
Click Accept. The pop up window indicates that the user has successfully signed in.
Close the pop up window.
Microsoft has successfully authenticated and authorized the Office365 account and users can now access the Email tab.
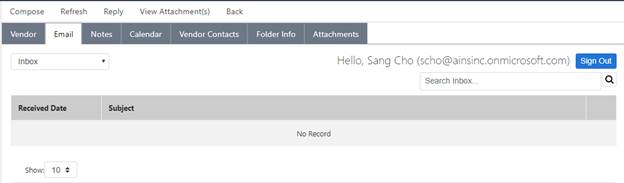
The Email tab displays sent and received emails that are associated with this contact’s email address. Users must define the contact’s email address in the Contact Form in order to utilize this functionality. If the Contact UI Form has been created for the selected contact type, map the EMAIL core field to a control in UI Designer and use that to define the contact’s email address.

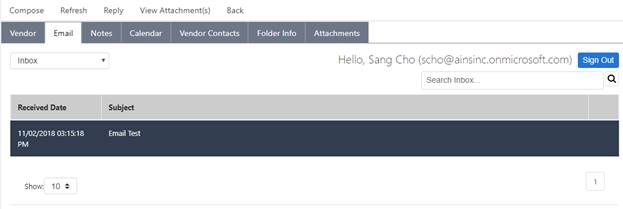
If any email messages have been sent between the Office365 account and the contact’s email address, those emails are shown in the Inbox/Sent Items section.
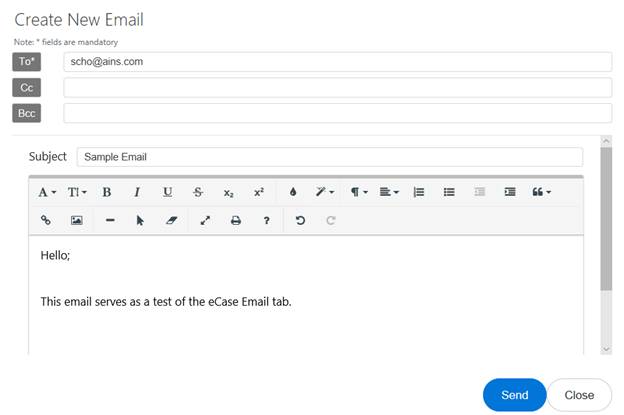
To compose a new Email,
Navigate to the desired case folder and click the Email tab.
Click Compose.

The Create New Email pop up window appears, and allows users to create and send new email messages within eCASE.
Users can click the Refresh button to update the Inbox and Sent Items sections. The screen refreshes and any new email messages appear within the tab.

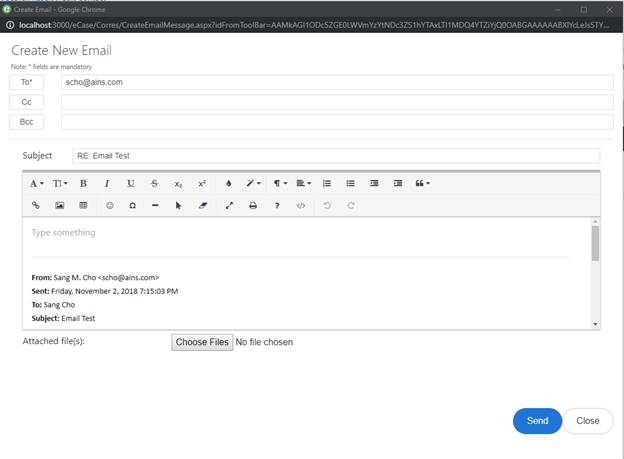
To reply to an email, select a message from either the Inbox or Sent Items section and click Reply. The Create Email popup window appears, and includes the recipient email, reply subject name, and any previous message content. After the reply message has been composed, click Send to send the message.

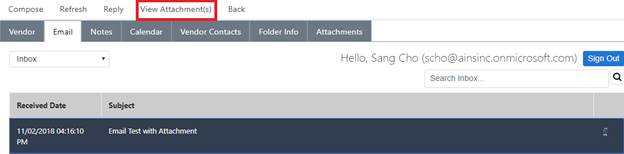
If an email message includes an attachment, an Attachment icon appears in the message row.

In order to view the attachment, select the message and click View Attachment(s).
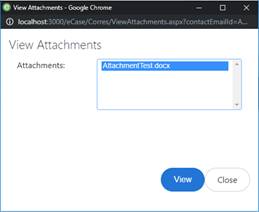
The View Attachments popup window appears. Select an attachment and click View to download the attachment to a local disk.
To read an email, double-click the desired email, and the Read pop up window appears. Users can reply to the email by clicking Reply.